Thursday, December 13, 2018

Baby Boy O'Quinn // Nursery Inspiration

I've been embarrassingly MIA over here lately. I have had so many grand ideas and plans but growing a baby is hard work! (Ok, in reality it hasn't been that hard, but still.) Once I'm home from my 9-5 and done with all my side hustle work, all I want to do is curl up on the couch. And the cooler winter weather definitely doesn't help. Don't get me wrong, I live in Southern California, so it's not like a true winter, but anything below 70 degrees to me is cold enough to requires a blanket and slippers!

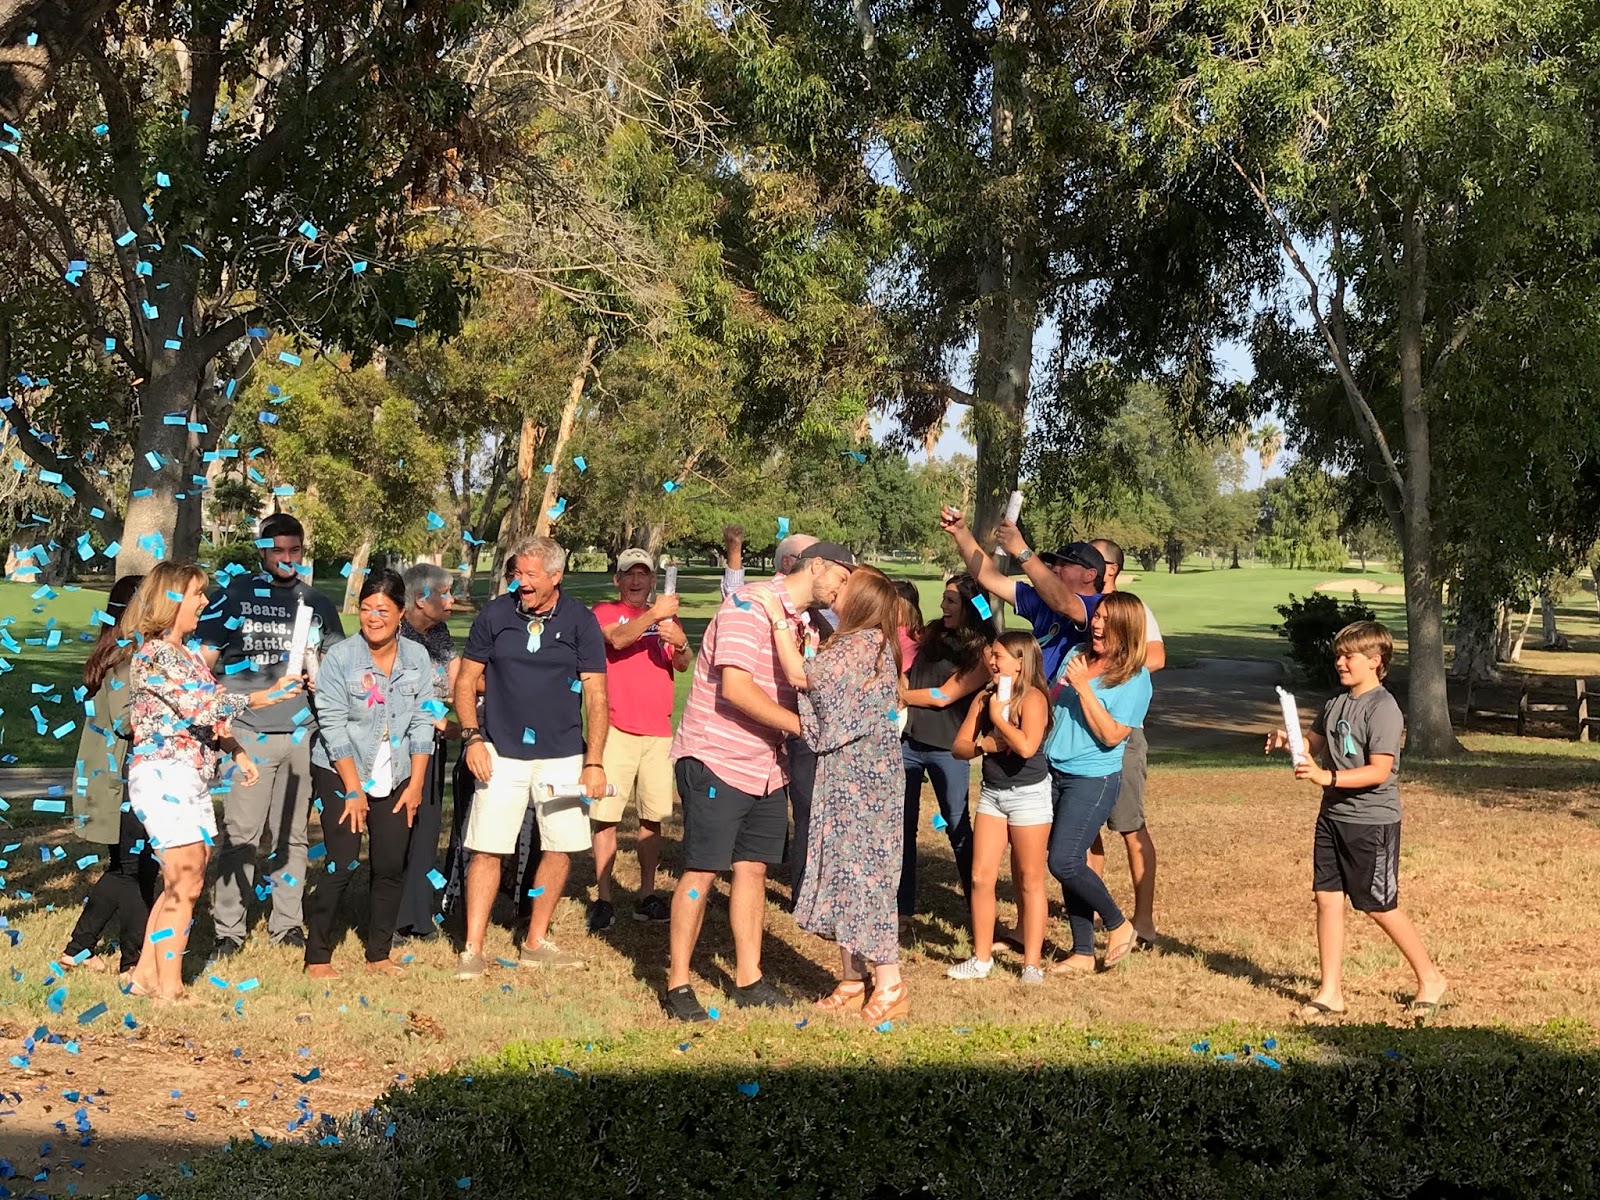
One exciting thing I've been working on lately, ever since our gender reveal, is our nursery. I can't wait to share it once it's all finished but I'll share my inspiration photo that I created in the meantime.

I was really going for a natural and neutral color palette. I know its crazy to already be thinking of baby number two, and while we don't know if that's even something we plan to do, I wanted to keep the nursery as gender neutral as possible. 
Gender neutral nursery inspiration.
Mint Leather Rocker // This was my first big nursery purchase. I originally found a very similar one from Crate and Barrel that was three times the price and WAY out of my budget. But then I found this one from Buy Buy Baby AND was able to use a 20% off coupon!

Beatles Print // If you didn't already know, Sam is a huge Beatles fan... he even has a Beatles tattoo (and yes, is trying to work the Beatles into baby boys name even). So something Beatles was necessary but I also like a more neutral vibe so this black and white print is perfect!

Bookshelves // I wanted a place for baby O's books to be out and almost decor for the room so these open bookshelves were perfect.

Leather Poof // I've just always wanted an excuse to get one of these and I figured the nursery was the perfect excuse! Haha.

Ukulele // So this had been an idea of mine basically since Sam and I got married. Because of Sams love of music, we did a white guitar as our wedding guestbook. It hangs in our living room and I love it. Not long after, I had the idea that if we ever had a baby, we could do a ukulele as a baby shower guestbook and use it as decor in the nursery and that's exactly what we did!

Dachshund Alphabet Print // It's no surprise I'm a dachshund lover. And I feel like an alphabet print is a nursery standard so this print was a no brainer.

Crib // This was, hands down my favorite crib from day one. I love the mix of white and wood, just the neutral color palette I was going for.

Custom Wooden Name Sign // We still haven't decided on a name (and to be honest, I don't really plan to until we meet him) so this might be something we do in the future but I just love the look of this one.

Rug // I needed something to warm up the space and this rug is perfect.

Faux Fiddle Leaf // Because you gotta have a little green in every room!

Dresser // Because of the wood element of the crib, I felt like a natural wood dresser would be best. And because Sam is a lumber salesman, he wholeheartedly agreed (although buying from Ikea was out of the question).

Wall Weaving // I love having a handmade element in every room. This weaving is one that I came across that is relatively neutral but incorporates the soft mint that I'm always drawn to (I mean, did you see the rocker??).

Dashboard Watercolor // If you didn't know by now, I'm a huge Dashboard Confessional fan, I couldn't even tell you how many times I've seen them. This print has a Dashboard saying "You have stolen my heart" which I feel like is the perfect sentiment for our little peanut.

Desert Print // Sam and I were married in the desert so it's really where our family began. I feel like having a print of the desert is a perfect nod to our beginning.

I seriously can't believe how fast this journey has gone. He's going to be here before we know it! In the meantime I'm nesting like crazy and trying to get the nursery pulled together before his arrival. So stay tuned for that! Also, be on the lookout for a post on my gorgeous baby shower that I still can't even believe was mine. It seriously was a mama-to-be dream!

Tuesday, September 25, 2018

The Big Reveal!

If you missed my big announcement back in July, we're expecting! We've got a new little O'Quinn scheduled to arrive in late January and we're thrilled. I went back and forth on whether or not I wanted to do a gender reveal party. It kind of feels a bit silly to be honest but, after talking to my friend Haley, she convinced me that I should because, like she said "it's better than just finding out in an office". Which I definitely agree. I can now say, after the fact, I'm super glad I did it. 

I didn't want anything big, just family (and of course my bestie Danica, who is basically family). Since this is the first grandchild on both sides, we've got some excited grandparents which, truthfully, is a big part of why I decided to do a reveal after all. So once a date and location was set, even though I wanted a low key affair, some crafting was of course in order!
Check out this adorable Gender Reveal Party!
I created maybe my favorite DIY ever with this welcome sign. It was surprisingly easy and yet made a great impact as soon as you walked in. I simply used some plywood that I had on hand from a previous project and some iron on vinyl (yes... iron on! It works SO great on wood!). The triangles were a last minute add to match the party decor, but they are removable vinyl so they can be removed and the sign can have a more modern look too!
Check out this adorable Gender Reveal Party!
And here are a couple of other DIY's that I cooked up. I created a guess the gender sign that read "What do you say, Little Sam or Little Shea". I used baby pictures of each of us for people to cast their vote. This was another piece of scrap plywood that I used some iron on vinyl and removable vinyl on. I also created badges for each guess to wear their vote (also adorned with baby photos of each of us). My favorite thing is how similar our first Christmas pics look to each other. 
Check out this adorable Gender Reveal Party!Check out this adorable Gender Reveal Party!
 Apparently there weren't a whole lot of poses to put babies in during the late 80's haha. 
Check out this adorable Gender Reveal Party!

Check out this adorable Gender Reveal Party!

Check out this adorable Gender Reveal Party!
The votes were surprisingly mixed. 
Check out this adorable Gender Reveal Party!
I also had to make come custom drink koozies for Sam and I. 
Check out this adorable Gender Reveal Party!
We also got an array of mini cupcakes from Miss Priss... I won't tell you how many I had but I will tell you, they were all delicious!
Check out this adorable Gender Reveal Party!
Sam and I both voted that we thought baby O was going to be a boy. Check out this adorable Gender Reveal Party!
Team Boy: Grandpa-to-be Gregg, Uncle-to-be Josh, Great Grandma-to-be Charlotte, Daddy-to-be Sam, Great Papa-to-be, Great Gram-to-be, Cousin-to-be Cade, me and Great Uncle-to-be Dale
Check out this adorable Gender Reveal Party!
Team Girl: Grandma-to-be Sandy, Bryan, Cousin-to-be Brynn, Great Aunt-to-be Christine, Grandpa-to-be Kevin, Maribel, Grandma-to-be Julie and Jamie

For the big reveal, I decided to order some Confetti Cannons. Since no one except Danica knew what baby O was going to be, I ordered both pink and blue and it was up to her to set aside the right ones. (They are very inconspicuously labeled so you really have no idea whats inside of each cannon until it goes off.)Check out this adorable Gender Reveal Party!
It was so suspenseful! (Plus there was the added fear that someone was going to take your head off with a confetti cannon haha.)
Check out this adorable Gender Reveal Party!
And just like we suspected... baby O is a little boy!
Check out this adorable Gender Reveal Party!
I had a feeling from early on that baby O was a boy, and all the old wives tales pointed to boy and yet I still teared up a little watching the confetti flutter in the air. I think it just made it that much more real... we really are having a baby!
Check out this adorable Gender Reveal Party!
In this moment, Sam is probably already planning out what little league he wants him in. 
Check out this adorable Gender Reveal Party!
Sams dad was clearly excited for a little boy. 
Check out this adorable Gender Reveal Party!
We of course had to get some photos in the confetti. 
(Note: the confetti is totally biodegradable, I'm no litter bug)
Check out this adorable Gender Reveal Party!
This pic cracks me up because it's the ultrasound pic that proves he's a boy, if you know what I mean. Haha.
Check out this adorable Gender Reveal Party!
The dogs weren't too amused to learn about their little brother. 
Check out this adorable Gender Reveal Party!
My mom, Sam and I spent the entire next day baby shopping since we now knew what we were having. I had previously refrained from really buying anything... a little secret though, the only baby thing I had bought before finding out was for a boy... apparently my mothers intuition has already kicked in! Just waiting for my eyes in the back of my head ;) Haha. 

Wednesday, September 19, 2018

DIY Wooden Ornament with Cricut

 Yay! It's time for another installment of the "Create with Cricut Challenge"! If you didn't get a chance to see my previous projects for the challenge you can find my felt project here, my cereal box project here, my burlap project here,  my tissue paper project here, my paint chip project here,  my leather project here, my wrapping paper project here, and my craft foam project here

If you're new around here and unfamiliar with the challenge, each month there is a new mystery material and using my Cricut, I make something using it! Isn't that fun?? This month, the material is wood! Lately I've been obsessed with adding Iron On vinyl to wood so that's what I did to create this totally custom ornament!
Make your own custom Ornaments with Cricut!

Supplies

<Post Contains Affiliate Links>
Which means, if you buy any of the cool stuff I recommend, you still pay the same price, but I get a small commission. Everybody wins! 
Cricut Iron On (I used gold foil)
Bakers Twine
Crop-a-Dile Big Bite Punch
Wooden Circle (can be found at your local craft store)
Cricut EasyPress 2
Make your own custom Ornaments with Cricut!
As always, I started by designing the file in Cricut Design Space. I first measured my wooden piece and replicated it on my mat so that I could really see what my finished product would look like. From there, I added the words and placed them just how I wanted them. I then attached them so they would stay in place while cutting. Then hit "Make It"!

Since you're working with Iron On, don't forget to mirror your cut!


Make your own custom Ornaments with Cricut!
Place your Iron On vinyl just where you like it on your wooden piece. Using the Cricut EasyPress Interactive Quick Reference Guide, find out what time and temperature you should set your EasyPress to. For this project, it will be 300 degrees for 40 seconds. 
Make your own custom Ornaments with Cricut!
Then let your EasyPress 2 do the work!
Make your own custom Ornaments with Cricut!
Once your Iron On is on your wood, use your Crop-a-Dile to punch the whole where you'd like it for hanging. 
Make your own custom Ornaments with Cricut!
And in just a few easy steps, you have a totally custom ornament! Wouldn't these be great for a newly married couple? Or you could make one for baby's first Christmas! The possibilities really are endless!
Make your own custom Ornaments with Cricut!


DIY Baby Stat Sign with Cricut EasyPress 2!

YOU GUYS!! Have you heard??  The new Cricut EasyPress 2 is here!! 
About a year ago Cricut announced the brand new EasyPress and once I got my hands on one, I was immediately in love, it's so simple to use! And unlike a traditional iron, the EasyPress has a ceramic coated heat plate which means a dry even heat, which you really can't get with your traditional iron. 
 I really didn't think it could get much better and then... IT DID with the new EasyPress 2! Not only does the new EasyPress 2 come in 3 sizes (6x7, 9x9 and 12x10), it also now has an even faster heat up time and can go up to 400 degrees! It also comes in an awesome raspberry color and has a new USB port for firmware updates, so you'll always be up to date! How cool is that!

Lately my favorite thing to put Cricut Iron on on is my wood projects! I love the finished look it gives and I also love that I don't have to mess with any transfer tape! So today I wanted to show you just how simple creating your own custom Baby Stat Sign is using the EasyPress 2 and some Cricut Iron On!
Create your own DIY Baby Stat sign with Cricut EasyPress 2!

Supplies

Post Contains Affiliate Links
If you buy the cool stuff I recommend, you still pay the same price, but I get a small commission. Everybody wins!
Cricut Iron On (I used white)
Plywood (You can buy large pieces from your local hardware store and have them trim them down for you! Thats what I did and for this project I used a 12x12 piece.)
Create your own DIY Baby Stat sign with Cricut EasyPress 2!
As always, I started by designing the file in Cricut Design Space. Did you know the Design Space software is available for iOS, Android, Windows, AND Mac?! You really can use it anywhere! Especially with the machines bluetooth wireless technology! 
One of my sorority sisters just had her baby so, using all of his birth stats I created a totally custom announcement sign for her! 
Create your own DIY Baby Stat sign with Cricut EasyPress 2!
When I design, I like to put a mock-up of the item I'll be applying to on my canvas so I can get a good visual. That's what the light brown square is. It's totally just for a visual though. I turn it off before I hit "Make It". Once you're happy with the way everything looks, select it all and attach it, this will make sure it all cuts exactly where you've placed it. Then... click that magic green "Make It" button.
Create your own DIY Baby Stat sign with Cricut EasyPress 2!
Don't forget to "mirror" your image before cutting and select "Iron on" to be sure to get that perfect kiss cut!
Create your own DIY Baby Stat sign with Cricut EasyPress 2!
Weed your design, which is removing all of the negative space. I love using my BrightPad for this.
Create your own DIY Baby Stat sign with Cricut EasyPress 2!
Then place your design on your iron on surface (the plywood). This is a good time to make sure everything is weeded properly, you have no spelling errors and everything is lined up just the way you want it because once you iron it on, there's no going back, especially with the new Cricut StrongBond Guarantee! Cricut really prides themselves on having the best-in-class iron on materials, so much so that they are now offering a StrongBond Guarantee which means that when a StrongBond materiel is used as directed, you'll be completely satisfied with the results. If not, they'll replace it for free! Because we are using the material on wood, it doesn't really apply since we won't be washing it, but a great thing to know!

To figure out how hot and how long to use your EasyPress 2, check out the new Interactive Quick Reference Guide. It has a couple simple drop down menus and then tells you exactly what to do! It's awesome!
Create your own DIY Baby Stat sign with Cricut EasyPress 2!
So for this project, I set my EasyPress temp to 300 and my timer to 40 seconds. The Interactive Quick Reference Guide takes out all the guess work! 
Create your own DIY Baby Stat sign with Cricut EasyPress 2!
Be sure to apply even pressure and heat to the entire project.
Create your own DIY Baby Stat sign with Cricut EasyPress 2!
And just like that, a totally custom baby stat sign! You can make one for your kiddos or as a super sweet gift for a friends new bundle of joy. Using iron on for wood makes this project a breeze. If you were to use traditional vinyl, you may have some trouble with the transfer tape and getting it to stick just right but using the EasyPress 2 and Iron On vinyl makes it so simple!

To make your own Baby Announcement Sign click HERE

(To customize, simply detach and change the info! It's that simple!)

This is a sponsored conversation written by me on behalf of Cricut. The opinions and text are all mine.


Monday, August 27, 2018

DIY Stick Horse with Cricut

OMG todays project is maybe one of my favorites ever. Ever since the launch of the Cricut Maker last summer I have had so many ideas floating around in my head that I wanted to make a reality. One of them was my Personalized Finger Puppets and I just LOVE the way they turned out. It's no secret that I'm a die hard Cricut fan. (See all the proof here), with the Maker and it's adaptive tool system, the possibilities of creativity really are endless! The performance and versatility really are unmatched.

Growing up my brother and I had our own stick horses. We loved chasing each other around on them and, on occasion used them as weapons haha. Well my best friends daughter has been loving horses lately (thanks to the Spirit Riding Free on Netflix) and I had the idea to attempt to create a stick horse of my own for her and I LOVE the way they turned out!
Create your own DIY Stick Horse with Cricut!

Supplies

Post Contains Affiliate Links

If you buy the cool stuff I recommend, you still pay the same price, but I get a small commission. Everybody wins!
Cricut Maker
Cricut Cutting Mats (You'll want a standard grip as well as a fabric mat)
Cricut EasyPress (Or Iron)
Cricut EasyPress Mat
Cricut Iron On (I used black, black glitter, white and white glitter)
Cricut Designer Fabric (I used Sweet Prairie)
Wooden Dowel (I used 1/2 inch)
E600 Glue (not pictured)
Sewing Clips (not pictured)
Batting (not pictured)
Create your own DIY Stick Horse with Cricut!
I started by designing the file in Cricut Design Space. Did you know the Design Space software is available for iOS, Android, Windows, AND Mac?! You really can use it anywhere! Especially with the machines bluetooth wireless technology! The original Design Space image is actually a unicorn (one of the "Three Unicorns" from the Unicorn Squad cartridge)  but I really wanted to do a traditional stick horse so I modified it to be a horse, you could totally leave it a unicorn for a more magical look though! Here is what it looked like before:
Create your own DIY Stick Horse with Cricut!
And with a few little modifications, voila, it's a cute horse!
Create your own DIY Stick Horse with Cricut!
The project is good to go if you want to make your own, all you have to do is click "Make It"! It's always easiest to change the colors to the materials you'll be using on the canvas screen to make loading the mats easy. 

Once you're in the mat preview screen, take a look at all of your mats. Don't forget to mirror any mats that will be any form of Iron On. Because for this project you will be cutting two of everything, facing two different ways, you technically don't have to mirror, but it's a good habit to get into. You can see from this picture where you can select the mirror option (the green toggle switch). 
Create your own DIY Stick Horse with Cricut!
This is also where I usually play around with the mats to minimize my iron on waste by moving all of my cuts appropriately on the mats, that is totally optional though, just me and my OCD haha. Also, be sure in between mats to double check your settings and be sure that you have selected the right material for each mat, especially if you are using glitter and lite iron on, and be sure to use Fast Mode where you can for up to 2x faster cutting and writing!

With all Iron On, you're going to want to put it face down on your cutting mat so your machine can do what is called a "kiss cut" where it cuts the vinyl but leaves the carrier sheet in tact. 

Technically with your fabric you also want to put it face down on your fabric grip cutting mat but again since there will be two cut out, I placed it face up and was fine. 
Create your own DIY Stick Horse with Cricut!
Watching the rotary blade work never gets old. And those cuts... perfection! The rotary blade makes cutting virtually any fabric without backing possible like it never was before!
Create your own DIY Stick Horse with Cricut!
Once all of your mats are cut, weed all of your iron on and start separating the front pieces from the back.
Create your own DIY Stick Horse with Cricut!
 Then, using your EasyPress (or iron) begin to apply your iron on. Because they are always updating it, be sure to reference the EasyPress recommended settings before getting started. You'll want to put the glitter iron on down first because it requires the most amount of heat. I did the mane and bridle in glitter, so those went on first. 
Create your own DIY Stick Horse with Cricut!
And then I applied the standard iron on, the eyes, nose and ears. 
Create your own DIY Stick Horse with Cricut!
Repeat on the other side. A couple of tips while working with your iron on:
-Be careful that your carrier sheets don't end up under any of your vinyl
- Always be sure to cover all iron on either with a carrier sheet or protective barrier of some kind so that it doesn't come in contact with the heat source. 

Then it's time to sew! Using sewing clips (or pins), clip your two pieces together and sew! Be sure to leave a small opening at the bottom to add batting and the dowel. 
Create your own DIY Stick Horse with Cricut!
Once you are finished sewing, begin stuffing your horse with batting, be sure to get it all the little corners too. I used a small wooden dowel to help, but your fingers work just fine also. 
Create your own DIY Stick Horse with Cricut!
Keep adding batting until you are happy with it. 
Create your own DIY Stick Horse with Cricut!
Then place your dowel inside, it may take a little wiggling but you'll want to me sure it goes all the way through, to give the head stability. Once you've got it through, seal the opening using E6000 glue. Once you are finished, add sewing clips and let it dry. 
Create your own DIY Stick Horse with Cricut!
Let the glue dry for several hours.
Create your own DIY Stick Horse with Cricut!
Removing the clips may be a little difficult depending on how much glue you used but you should be able to get them off with a little muscle. 

And that's it! The Maker really does all the hard work for you, all you need are the materials and some basic sewing skills and you can make a DIY Stick Horse of your own!

To make your own DIY Stick Horse click HERE

Create your own DIY Stick Horse with Cricut!
This is a sponsored conversation written by me on behalf of Cricut. The opinions and text are all mine.


Related Posts Plugin for WordPress, Blogger...