Wednesday, September 25, 2019

DIY Personalized Ribbon with Cricut EasyPress Mini

If you're a Cricut fan, I'm sure you've seen the exciting news that they have a new product that they've added to the EasyPress family, the EasyPress Mini! It's so stinkin' cute! I thought the 6" x 7" size was cute but the Mini is even smaller and more adorable! (Why are small things so cute?) It's the perfect companion to the ever growing family of EasyPress machines.
When I first saw it, my mind started racing with ideas of ways to use it, (the first of which I'm sharing with you today). 
The new mini is perfect for small and unique projects that previous EasyPresses maybe couldn't accomplish (or that might have just been a little more challenging) like hats, shoes, shirt sleeves, cuffs and even stuffed animals! Like the EasyPress 2, the Mini offers an even heat plate (unlike a traditional iron that can vary in temperature by 200 degrees, crazy right?) and easy to use heat settings for effortless heat transfers. 
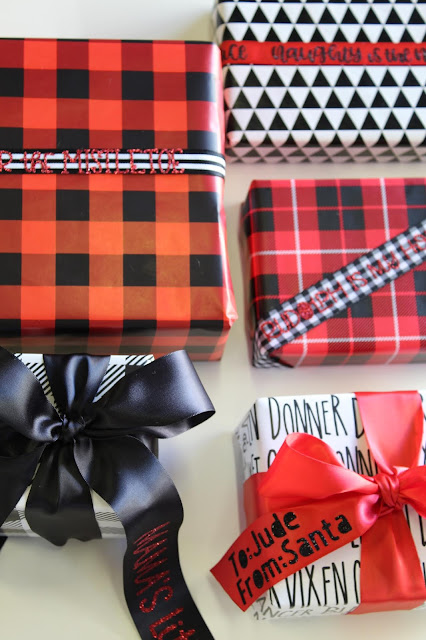
If you've known me for any amount of time, you know that I love giving gifts and a huge part of it is that I LOVE wrapping gifts. I think because my love language is receiving gifts, it's also my way of showing my love. The adorable new EasyPress Mini is perfect for personalizing your ribbon for gifts!

This is a sponsored conversation written by me on behalf of Cricut. The opinions and text are all mine.
Post may contain affiliate links. This means if you buy the cool stuff I recommend, you still pay the same price, but I get a small commission. Everybody wins!


Create your own Personalized ribbon with Cricut's NEW EasyPress Mini!

Create your own Personalized ribbon with Cricut's NEW EasyPress Mini!

Create your own Personalized ribbon with Cricut's NEW EasyPress Mini!

Create your own Personalized ribbon with Cricut's NEW EasyPress Mini!

Create your own Personalized ribbon with Cricut's NEW EasyPress Mini!


Create your own Personalized ribbon with Cricut's NEW EasyPress Mini!
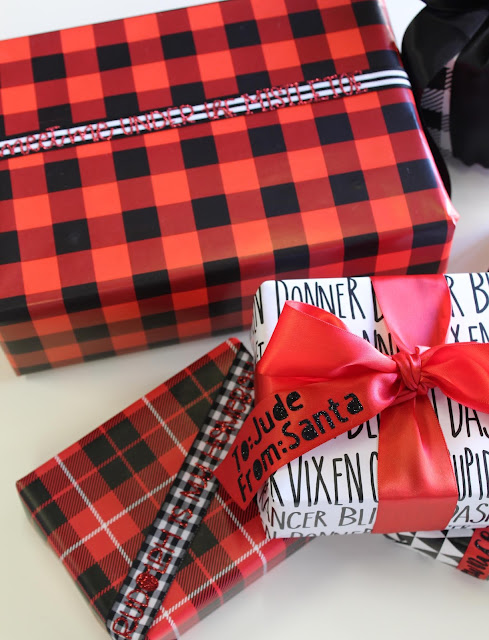
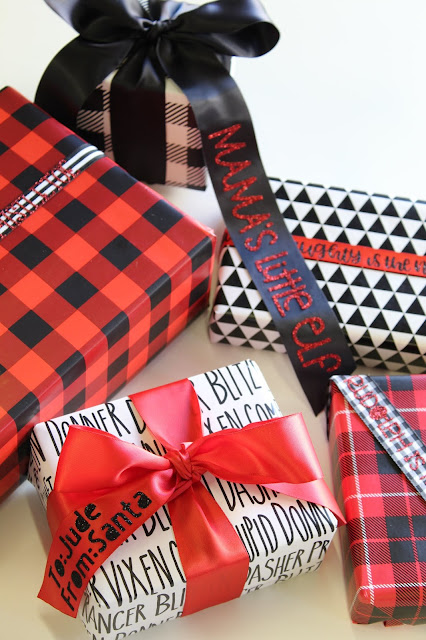
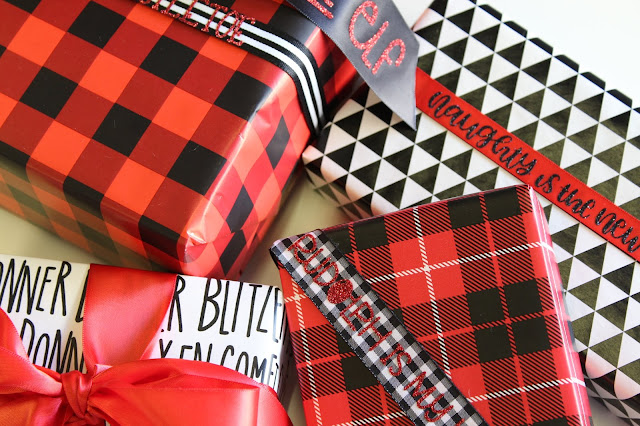
It's a super fun way to add that little personal touch to your gifts. Not only can you add a fun sentiment, you can also use this technique in place of a gift tag as well! I've never been a fan of traditional gift tags, especially holiday ones because they usually clash with my wrapping paper and as a (self proclaimed) gift wrap aficionado, that just won't fly for me. (It's also a great way to add that "special" touch to gifts that come from the North Pole if you know what I mean ;) )

Supplies

Create your own Personalized ribbon with Cricut's NEW EasyPress Mini!
Start by designing your file in Cricut's Design Space. Measure the height of your ribbon and make sure that your design fits before cutting. If you'd like to use any of my designs, HERE is my Design Space file.  
Create your own Personalized ribbon with Cricut's NEW EasyPress Mini!
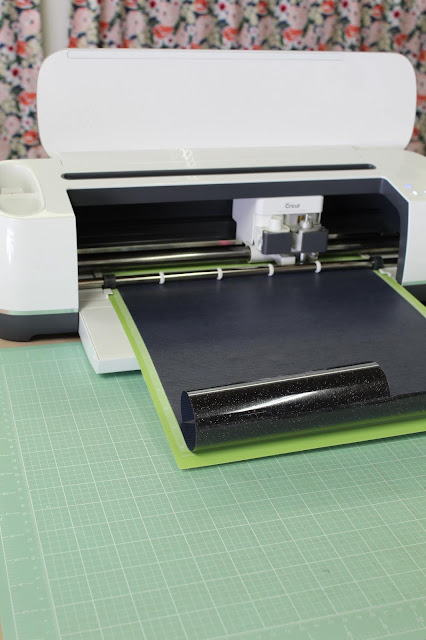
Once you are ready to cut, lay your iron on material shiny side down on your mat. I find it easiest to roll it on. Select the correct material (or if you're using an Explore machine, set your dial) and don't forget to mirror your project before cutting!
Create your own Personalized ribbon with Cricut's NEW EasyPress Mini!
Then let your machine do it's thang. 
Create your own Personalized ribbon with Cricut's NEW EasyPress Mini!
Weed (or remove the negative space from) your design. I cut most of the designs several times so that I could have the sayings repeat on the ribbon but that's totally up to you. I also like the look of it just being on the tails too. 
Create your own Personalized ribbon with Cricut's NEW EasyPress Mini!
Using your weeding tool, remove all the little insides of the letters. Not gunna lie, this was a little time consuming, and I maaaaay have lost some (or all) of the dots for the i's, but the final result was just as cute, so it's all good. 
Create your own Personalized ribbon with Cricut's NEW EasyPress Mini!
Now time for the fun part!
The new EasyPress Mini is a little different from previous EasyPresses. It only has three settings and no timer so you'll want to check the Cricut Heat Guide to find out what setting to use for your project. It takes all of the guess work out of it! Because I was using glitter iron-on on a polyester ribbon, I used the medium heat setting on the EasyPress Mini for 25 seconds. It also told me to use constant movement and light pressure. 
Create your own Personalized ribbon with Cricut's NEW EasyPress Mini!
The design is so ergonomic, it feels great in your hand!
Create your own Personalized ribbon with Cricut's NEW EasyPress Mini!
The heat guide recommended a warm peel, so, while the project was still warm, I removed the carrier sheet and the results were perfect!
Create your own Personalized ribbon with Cricut's NEW EasyPress Mini!
I had so much fun creating all these ribbons and can't wait to use this technique on all of my future gift giving! 
Create your own Personalized ribbon with Cricut's NEW EasyPress Mini!

Create your own Personalized ribbon with Cricut's NEW EasyPress Mini!

Create your own Personalized ribbon with Cricut's NEW EasyPress Mini!

Create your own Personalized ribbon with Cricut's NEW EasyPress Mini!

Create your own Personalized ribbon with Cricut's NEW EasyPress Mini!

Create your own Personalized ribbon with Cricut's NEW EasyPress Mini!

Create your own Personalized ribbon with Cricut's NEW EasyPress Mini!

Create your own Personalized ribbon with Cricut's NEW EasyPress Mini!

Create your own Personalized ribbon with Cricut's NEW EasyPress Mini!

Create your own Personalized ribbon with Cricut's NEW EasyPress Mini!
I'm so excited to add the new EasyPress Mini to my crafting arsenal. I can't wait to keep testing the limits of this mini but mighty little guy! Let me know if you have any questions or any ideas for new ways I can use it!

Wednesday, September 18, 2019

DIY Advent Calendar with Cricut

This is a sponsored conversation written by me on behalf of Cricut. The opinions and text are all mine.


You guys! We are officially less than a hundred days out from Christmas! I've never really been the type to get super excited about Christmas because with it, also comes tons of added stress but this year... I get to celebrate the first Christmas with my little! The thought of being able to experience Christmas again through the eyes of a child literally has me giddy. So, that being said, it's not too early for a Christmas craft right? Truth be told, this DIY could really be used for any occasion, traditionally the advent calendar is used for Christmas but you can countdown to anything really... a birthday, a wedding, a graduation, the list goes on! But let's get to it shall we?
So, if you haven't heard, Cricut recently released four new tools for their incredible Maker machine. I was fortunate enough two years ago to be at the Cricut Mountain Make-a-thon where they announced the Maker, and with it's announcement came the promise that with its Adaptive Tool System would come even more incredible features and they weren't lying! I actually met with Ashish the Cricut CEO at a meet and greet recently and he asked me "Well, did we keep our promise?" and he certainly has. The revolutionary Adaptive Tool System brings together three major technologies that give the Maker machine professional class cutting versatility and performance. It delivers 10 times (4 kg) or more cutting force than the Explore line. It uses a sophisticated steering system to actively control the direction of the blade at all times. And it tests to be sure you are using the correct blade before it starts cutting, and tells you to change it, if not, so intuitive!

If you're unfamiliar with the new tools, allow me to fill you in:
We've got the Basic Perforation Blade - With this blade you can create finely perforated lines for any design. You know those little lines that help you tear a ticket perfectly? Now you can create them yourself with this awesome new blade! (Spoiler alert, I used this bad boy for todays project and I LOVE it.) The tip simply snaps onto the QuickSwap Housing and your Cricut Maker does the rest! It's perfect for tear-out booklet pages, raffle tickets, homemade journals, or for any project that calls for a neat tear. 

Then there's the Wavy Blade - A wavy finish was always doable with the standard fine tip blade but it would take much longer. Now with the new wavy blade you are able to get a decorative edge in half the time! This blade is perfect for vinyl decals, iron-on designs, envelopes, cards, gift tags, collage projects, or any time you need fabulously finished edges and stylish design accents. Perfect for iron-on, vinyl, paper, cardstock, fabric, and more! (I also used this blade for todays project!)   

There's also the Fine Debossing Tip - There is something super elegant and polished about debossing. It definitely has a professional look that screams custom. Unlike the folders that most crafters are used to for debossing, this rolling debossing ball, with a wider range of motion, gives you free reign to customize, personalize, and design with incredible intricacy. It's the perfect tool for the ultimate personalized touches. It helps create a stunning effect on foil cardstock, coated paper, shimmer and glitter paper, basswood, and much more.   

And lastly the Engraving Tip – This is one I really can't wait to try and is something I'll be honest, I was a little disappointed I couldn't do with my first Explore machine (there are some tutorials online but they seemed a bit dodgy to me). With this tip you are able to write personalized text or create monograms, draw decorative flourishes and embellishments, or inscribe your favorite quotes on a keepsake! I can't wait to engrave the new Cricut Metal Sheets! Speaking of Christmas... I've already got some gift ideas brewing using the engraving tip!

So now that I've filled you in on the new tools, let's get into the DIY!
Make your own custom advent calendar with your Cricut!
If you're new around here, I have two favorite Christmas past times, stockings and advent calendars. After the Cricut Maker was able to help me create my own stockings, I really wanted to try my hand at making my own advent calendar with some of the new tools and I love the way it turned out! 

 Supplies:


Make your own custom advent calendar with your Cricut!
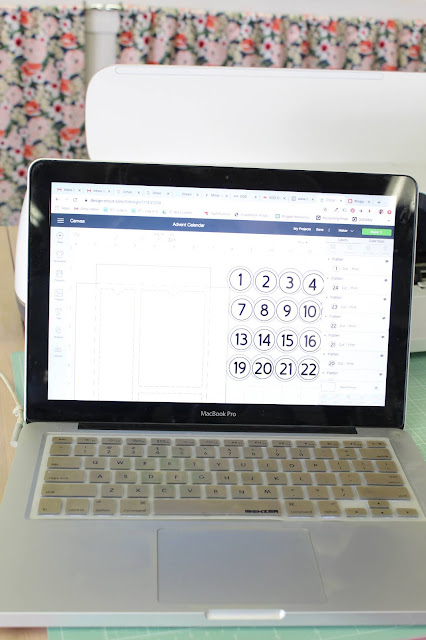
Open the project in Cricut Design Space. I've already done all of the work for you! All you have to do is click Make It! Some things to note: I have created the file so that you can make up to 8 segments (24 boxes, like a traditional advent calendar). I decided I preferred the look of 12 thought, more like the 12 days of Christmas, totally up to you though. s
Make your own custom advent calendar with your Cricut!
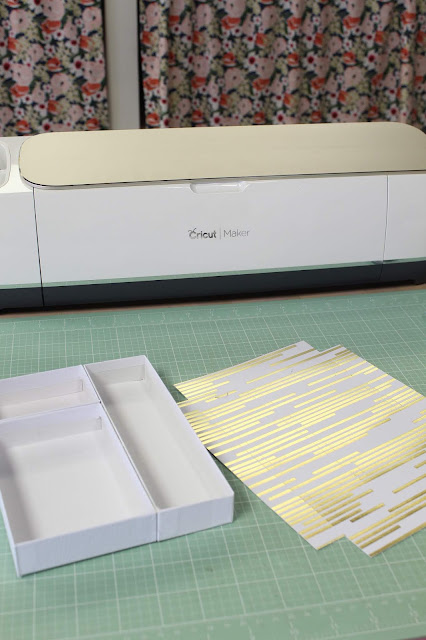
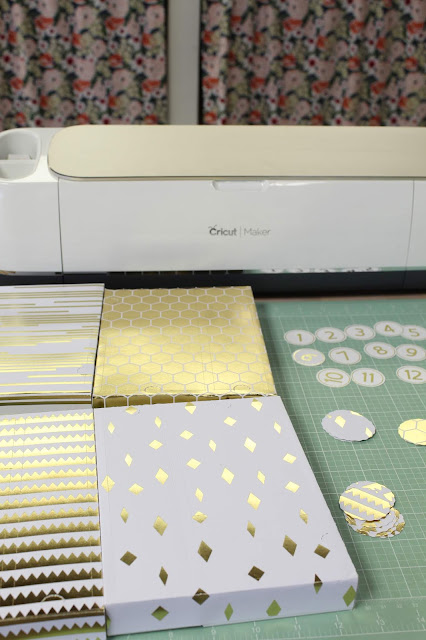
 Hit make it and watch the Cricut do it's magic! The first thing it will prompt you to do is print the first page (I prefer to do this on cardstock for a more polished look, it also will cut better for you than standard copy paper.) Once printed, place your paper on your cutting mat and watch your Cricut do its magic, reading the sensor lines and cutting your printed items perfectly!
Make your own custom advent calendar with your Cricut!
 Remove the printed numbers from the mat.
Make your own custom advent calendar with your Cricut!
(If you're extra like me, I printed my numbers on my laserjet printer so that I could foil them using my Heidi Swapp Minc machine. This is totally optional, but I am afflicted with the Midus Touch and prefer for everything I touch to be gold.)

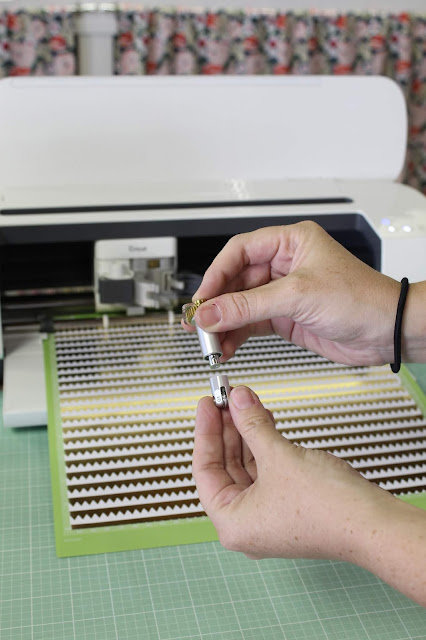
After the numbers have been cut using the fine tip blade, you will then be prompted to use the single scoring wheel (If you don't have it, you can also use the scoring stylus for this). The Quick Swap Housing makes swapping the blades a breeze, simply push the plunger on the top of the housing and it will release whatever blade is on it, while it's down, add whichever new one you want and voila! Easy peasy!
Make your own custom advent calendar with your Cricut!
 Then it's time for the Basic Perforation Blade! The Cricut Maker is so smart and tells you what blade you should be using and even checks to make sure you have the right one in there!
Make your own custom advent calendar with your Cricut!
One last swap to the wavy blade and you'll be all done! Time to remove your next mat! (Pro tip: remove the mat from the paper instead of the paper from the mat to avoid curling.)
Make your own custom advent calendar with your Cricut!
As I perviously mentioned, my Design Space file can be cut to make an advent up to 24 days. Mine for this project will only be 12. 

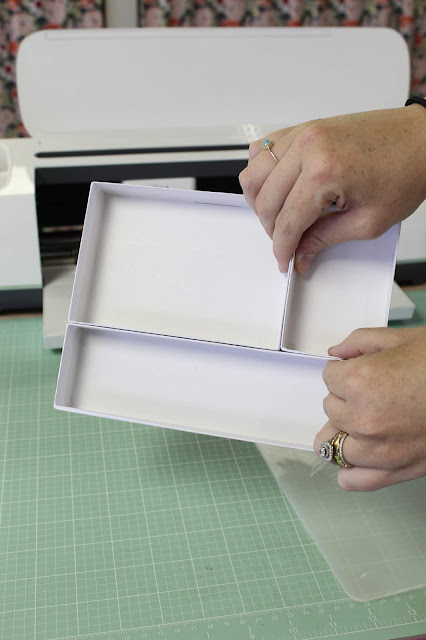
Now it's time to prepare the boxes! These boxes come three for a dollar at the Dollar Tree and are perfect for this project! Start by laying the boxes in the same format as they are in the design space file (long box on the left, medium box on the top right, and small box on the bottom right). Using your hot glue gun, glue them all together, being sure they are placed the same as the file. 
Make your own custom advent calendar with your Cricut!

Make your own custom advent calendar with your Cricut!

Make your own custom advent calendar with your Cricut!
 Repeat as many times as you'd like (again, I did 12, but you can do as many as 24!).
Make your own custom advent calendar with your Cricut!
 And now for the fun part! Time to start really assembling!
Make your own custom advent calendar with your Cricut!
This is also when you want to fill your boxes with goodies! (After this will be too late and you'll be opening empty boxes so don't forget!)
Make your own custom advent calendar with your Cricut!
 Fold on the scored lines. Because the perforated lines are SO good, you're going to naturally want to fold on those, but don't! Be careful as you fold and only fold on the scored lines.
Make your own custom advent calendar with your Cricut!
 I love using the XL Scraper tool to get a crisp fold.
Make your own custom advent calendar with your Cricut!
 Lay the folded piece on your box, it should fit like a glove! (I did some serious math-ing for this project so I hope ya'll appreciate it haha.)
Make your own custom advent calendar with your Cricut!
 Using your tape runner (this one is my all time fave) attach the paper to your boxes, again being mindful of where the perforation lines are and what boxes are where so they all line up.
Make your own custom advent calendar with your Cricut!

Make your own custom advent calendar with your Cricut!
 Perfect!
Make your own custom advent calendar with your Cricut!
 Repeat as many times as you'd like! (I went with 4, which gave me 12 total.) I liked the look of four different patterns for my paper but that's totally up to you! You can do all of them the same if you prefer!
Make your own custom advent calendar with your Cricut!
 Now it's time to assemble the numbers.
Make your own custom advent calendar with your Cricut!
 Use your tape runner to attach the numbers to the circles. I just had to test out the new Wavy Blade for this project, and I decided to use it on the patterned circles. How 'bout those wavy lines! So cool right?
Make your own custom advent calendar with your Cricut!
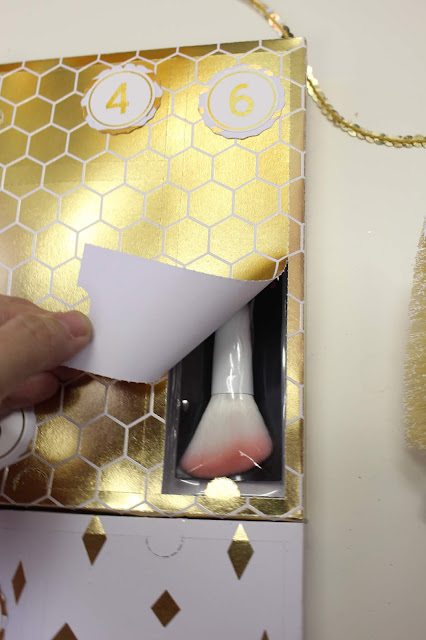
 Then use your tape runner once more to adhere the numbers to each perforated box. Feel free to place them wherever your heart desires, the order is totally up to you!
Make your own custom advent calendar with your Cricut!
 Once you're done, hot glue all of your boxes together and you're done!
Make your own custom advent calendar with your Cricut!

Make your own custom advent calendar with your Cricut!
 Check out those perforation lines.. and the wavy lines! 
Make your own custom advent calendar with your Cricut!
 The perforation lines make opening each box a breeze! I can't wait to dream up some more projects I can do with all the new blades!
Make your own custom advent calendar with your Cricut!

Make your own custom advent calendar with your Cricut!
I can't wait to see what's next from Cricut but until then, I can't wait to keep playing with all of these new tools!

Thursday, August 29, 2019

DIY Modern Geometric Baby Mobile

Hi friend! Long time no see... er... type? Soooo... I had a baby. Haha. And life has pretty much been crazy ever since. It's the best and hardest job I've ever had (and tbh, the pay sucks ;)). I'm slowly but surely finding my footing and figuring out how to "do it all"... or at least pretend I am.

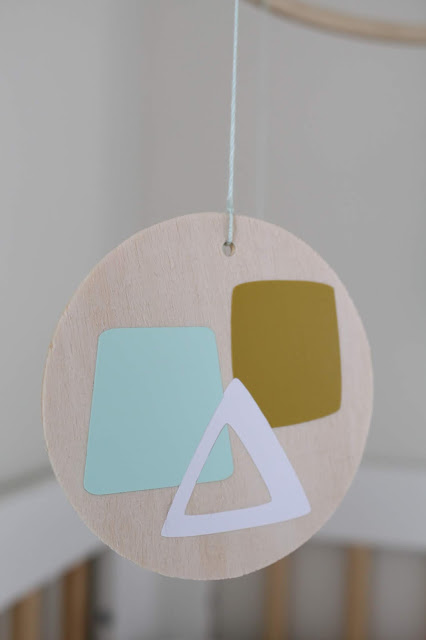
It's no surprise that I am a die hard Cricut fanatic. Anything I can make with my Cricut, I generally do. My little one's nursery was no exception and wasn't safe from my Cricut-ing. After making my own baby mobile, I wanted to be able to share just how easy it was. Thankfully, I had the opportunity to create a DIY for my blogger boss Jen over at Something Turquoise. For the past 5 or so years I've worked for Jen as her Pinterest account manager and craft assistant and up until about last month it was exclusively a bridal blog. The team has started having babies like crazy so it only made sense to broaden our horizons and include more facets of life, like babies! It just felt like the perfect place to share my DIY... but I of course had to share it with you guys too! Check it out!
OMG this DIY Modern Geometric Baby Mobile is a must see!

OMG this DIY Modern Geometric Baby Mobile is a must see!

OMG this DIY Modern Geometric Baby Mobile is a must see!

OMG this DIY Modern Geometric Baby Mobile is a must see!

OMG this DIY Modern Geometric Baby Mobile is a must see!
 For the full tutorial go check it out on Something Turquoise!

Thursday, December 13, 2018

Baby Boy O'Quinn // Nursery Inspiration

I've been embarrassingly MIA over here lately. I have had so many grand ideas and plans but growing a baby is hard work! (Ok, in reality it hasn't been that hard, but still.) Once I'm home from my 9-5 and done with all my side hustle work, all I want to do is curl up on the couch. And the cooler winter weather definitely doesn't help. Don't get me wrong, I live in Southern California, so it's not like a true winter, but anything below 70 degrees to me is cold enough to requires a blanket and slippers!

One exciting thing I've been working on lately, ever since our gender reveal, is our nursery. I can't wait to share it once it's all finished but I'll share my inspiration photo that I created in the meantime.

I was really going for a natural and neutral color palette. I know its crazy to already be thinking of baby number two, and while we don't know if that's even something we plan to do, I wanted to keep the nursery as gender neutral as possible. 
Gender neutral nursery inspiration.
Mint Leather Rocker // This was my first big nursery purchase. I originally found a very similar one from Crate and Barrel that was three times the price and WAY out of my budget. But then I found this one from Buy Buy Baby AND was able to use a 20% off coupon!

Beatles Print // If you didn't already know, Sam is a huge Beatles fan... he even has a Beatles tattoo (and yes, is trying to work the Beatles into baby boys name even). So something Beatles was necessary but I also like a more neutral vibe so this black and white print is perfect!

Bookshelves // I wanted a place for baby O's books to be out and almost decor for the room so these open bookshelves were perfect.

Leather Poof // I've just always wanted an excuse to get one of these and I figured the nursery was the perfect excuse! Haha.

Ukulele // So this had been an idea of mine basically since Sam and I got married. Because of Sams love of music, we did a white guitar as our wedding guestbook. It hangs in our living room and I love it. Not long after, I had the idea that if we ever had a baby, we could do a ukulele as a baby shower guestbook and use it as decor in the nursery and that's exactly what we did!

Dachshund Alphabet Print // It's no surprise I'm a dachshund lover. And I feel like an alphabet print is a nursery standard so this print was a no brainer.

Crib // This was, hands down my favorite crib from day one. I love the mix of white and wood, just the neutral color palette I was going for.

Custom Wooden Name Sign // We still haven't decided on a name (and to be honest, I don't really plan to until we meet him) so this might be something we do in the future but I just love the look of this one.

Rug // I needed something to warm up the space and this rug is perfect.

Faux Fiddle Leaf // Because you gotta have a little green in every room!

Dresser // Because of the wood element of the crib, I felt like a natural wood dresser would be best. And because Sam is a lumber salesman, he wholeheartedly agreed (although buying from Ikea was out of the question).

Wall Weaving // I love having a handmade element in every room. This weaving is one that I came across that is relatively neutral but incorporates the soft mint that I'm always drawn to (I mean, did you see the rocker??).

Dashboard Watercolor // If you didn't know by now, I'm a huge Dashboard Confessional fan, I couldn't even tell you how many times I've seen them. This print has a Dashboard saying "You have stolen my heart" which I feel like is the perfect sentiment for our little peanut.

Desert Print // Sam and I were married in the desert so it's really where our family began. I feel like having a print of the desert is a perfect nod to our beginning.

I seriously can't believe how fast this journey has gone. He's going to be here before we know it! In the meantime I'm nesting like crazy and trying to get the nursery pulled together before his arrival. So stay tuned for that! Also, be on the lookout for a post on my gorgeous baby shower that I still can't even believe was mine. It seriously was a mama-to-be dream!
Related Posts Plugin for WordPress, Blogger...