
You guys! I'm so stinkin' excited to share today's project with you! It's no secret that I'm a die hard Cricut fan. (See all the proof here). Well, they have been hard at work creating tons of awesome new products and I'm thrilled to share one of them with you today... the NEW Cricut Patterned Iron On! I love Cricut Iron On in general, but this Patterned Iron On is a total game changer! It opens up so many more possibilities! Even though Cricut has a vast selection of Iron On vinyl (like Lite, Foil, Holographic Sparkle, Glitter and the NEW SportFlex!), you were previously limited to just one color at a time, and I know the idea of layering is scary to a lot of crafters (myself included). With the Patterned Iron On though, your designs are now given so much more texture and dimension with the patterns, not to mention, the new StrongBond long-lasting hold! They currently have 9 different sampler packs available, each with 3 12" x 17" sheets... so many possibilities! I personally love that each sampler pack comes with iron on vinyl that compliment each other, so you can use them separately, or together!
I decided I wanted to do use the Natalie Malan Sunset Blossom Patterned Iron On Sampler. I'm all about watercolor right now and those watercolor patterns are just GORGEOUS. As soon as I saw them, I had a million ideas, but first on the list was a custom bride shirt for a friend of mine getting married next month.

A few things I noticed about the patterned iron on that sets it apart from from the regular iron on:
- It lays flat: a lot of times with regular iron on, because it has been on a roll, it has a tendency to curl. The patterned iron on however, doesn't.
- The smell: Not gunna lie, when I opened it up, the smell kind of hit me. I'm assuming it's the smell of whatever it is they use to make it "StrongBond", it's like a heavy duty adhesive smell.
- Weeding: It weeds a little differently than the iron on you're used to. I can't really say that it's easier or harder, just different.
- Carrier sheet: The carrier sheet isn't sticky... at all! This definitely took some getting used to.
Supplies
Post Contains Affiliate Links
If you buy the cool stuff I recommend, you still pay the same price, but I get a small commission. Everybody wins!
Cricut Maker
Cricut Cutting Mat
Cricut Patterned Iron On (I used Sunset Blossom)
Cricut EasyPress (Or Iron)
Cricut EasyPress Mat

I started by designing the file in Cricut Design Space. I kept the "Bride" and date separate so that you can replace the date with whatever date you'd like. I do, however recommend welding both together before cutting to ensure proper placement. (Don't you just love the "Bride" font? It's called Emiline and is a Cricut Access font.)

Once you have the project looking how you'd like, hit "Make It" in the upper right hand corner. This will take you to the mat preview screen. Don't forget to mirror when using any form of Iron On!

Find "Patterned Iron-On" in the materials menu.

With all Iron On, you're going to want to put it face down so your machine can do what is called a "kiss cut" where it cuts the vinyl but leaves the carrier sheet in tact.

Once your design is cut, weed it and place it where you'd like on your garment. Then, using your EasyPress (or iron) apply your design.

Applying Patterned Iron On
Patterned Iron On is likely a little different from any Iron On that you're used to. Be sure to reference the Patterned Iron On cutting and application settings here, and if you are using the EasyPress and/or EasyPress mat, you can find those settings here.
If using an EasyPress, you're going to want to preheat the area of the material in which you will be applying your cut image for 5-10 seconds. Set your EasyPress to the appropriate temperature and time for your specific garment, mine was 340 F for 30 seconds on the front of the garment, then 15 seconds on the back of the garment, using firm pressure. With Patterned Iron On you're going to want to wait until the design has cooled before removing the carrier sheet. This is what we call a "Cold Peel".
For an Iron, preheat the area of the material in which you will be applying your cut image for 5-10 seconds. Use the cotton setting of your iron for 50 seconds on the front of the garment, 15 seconds on the back of the garment, using firm pressure. And again, wait until the design has cooled before removing the carrier sheet.
And while we are on the topic of application... can we discuss the new EasyPress Mat?!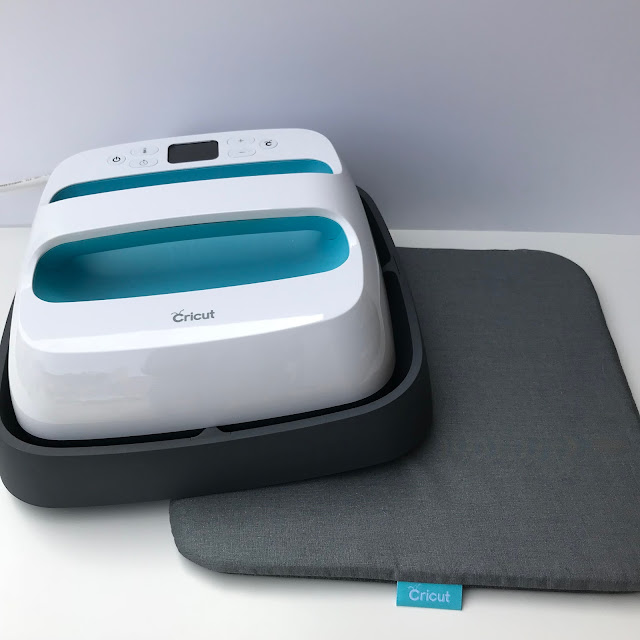

It's the perfect companion for your Cricut EasyPress! It has five layers and was designed specially for use with the Cricut EasyPress. The durable cover provides thermal conductivity and even heat distribution. A special inner liner wicks moisture to deliver clean, dry heat. The foil membrane reflects heat to your project and prevents moisture vapor transfer, while the silicone foam provides insulation and shields your surface from damaging heat. Finally, the soft, protective bottom barrier seals layers together for flawless results. It really is a match made in crafting heaven!
If you'd like to make this project yourself, click HERE.
This is a sponsored conversation written by me on behalf of Cricut. The opinions and text are all mine.

No comments:
Post a Comment