
2017 has officially come to a close and as I'm putting away all of my Christmas decor I can't believe another year has come and gone. On the night of Christmas I found myself feeling a little blue that it was all over. Anyone else feeling those post holiday blues?
That's when I decided a DIY was in order! For pretty much as long as we've been together, Sam and I have sent out a holiday card, and getting others in return is always a highlight of the season. What do you do with them once the holidays are over though? I was brainstorming ideas of how I could preserve my cards and somehow turn them into a keepsake. I thought about hole punching them and adding some twine to create an ornament, but most cards are too large for that and it would just look silly. Then it hit me! I remembered this DIY from my blogger boss babe Jen. She created keychains using Shrinky Dink and photos. I could use that same technique with holiday cards! So, I decided to give it a try.

SUPPLIES
- Inkjet Printer (This is the one I use)
- Inkjet Shrink Film (Clear or White)
- Parchment Paper
- Scissors or Paper Trimmer (This is my go-to)
- Hole Punch (Or invest in a Crop-a-Dile... you wont regret it)
- Twine

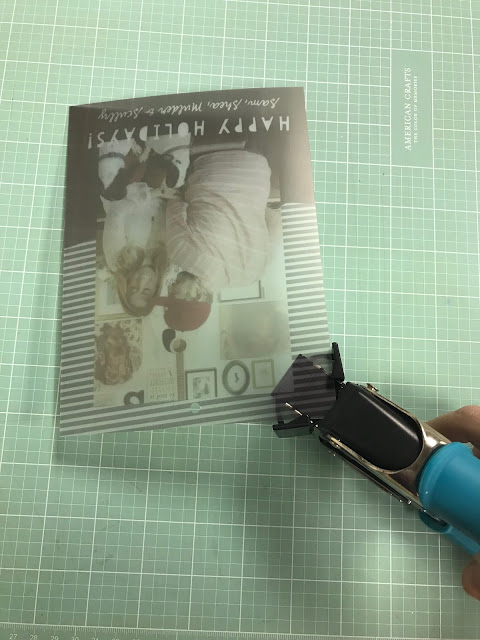
TRIM & HOLE PUNCHOnce printed, trim the film down, touching it as little as possible.


An optional step is to use a corner rounder. I prefer the look of a rounded corner. So I did this for mine.
BAKE TO SHRINKThis is seriously the craziest thing to watch. Read the instructions on the packaging and follow them and in a matter of a couple minutes, you will have your finished product! (Be careful, because they will be hot.) If they come out a bit uneven, I simply pressed them flat using my oven mitt over the parchment paper.

ADD THE TWINEOnce it has cooled, you're just about done! All you have to do is add some twine and voila! A custom ornament! AND YOU'RE DONE!

This DIY would be great to preserve your own holiday cards, OR you could create them for your friends and family, using the cards that they send you! Such a fun and simple way to cherish your holiday cards for years to come!


No comments:
Post a Comment